
How to Set Up a Baitcasting Reel Without Backlashes: A Practical Beginner Guide for 2026
Learn how to set up a baitcasting reel like a pro. Master spool tension, magnetic and centrifugal brakes, and first-cast technique. Fix backlashes fast and choose beginner-friendly reels that make setup easy.
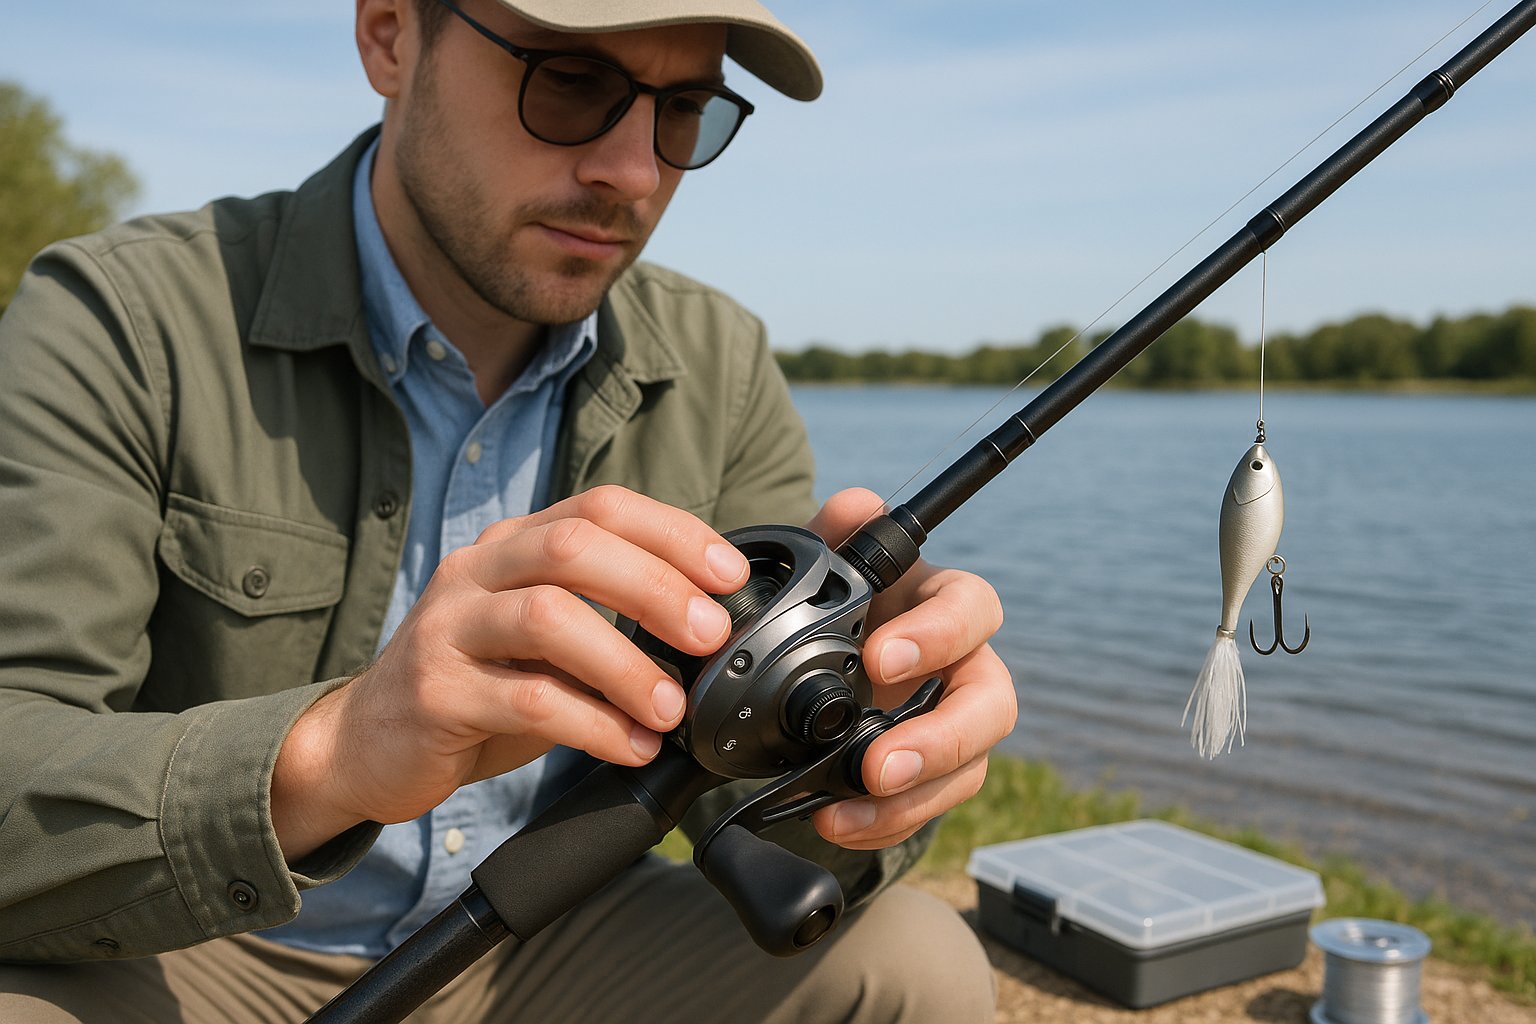
Baitcasting reels give us better casting control, stronger hooksets, and more precision than many spinning setups, but only when they're adjusted correctly. If the reel isn't dialed in, the result is usually the same: frustrating backlashes, short casts, and a lot of line picking.
The good news is that learning how to set up baitcasting reel systems isn't complicated once we understand what each adjustment actually does. In this guide, we'll walk through the parts of a baitcaster, explain reel adjustment step by step, and show exactly how to tune spool tension and brakes for clean, confident first casts. We'll also cover a few beginner-friendly reels that make setup easier. By the end, we'll have a simple baitcaster setup guide we can use every time we tie on a new lure.
Understanding Baitcasting Reel Components
Before we touch a dial, it helps to know what each part controls. This is the foundation of a reliable beginner baitcaster setup because most casting problems come from adjusting the wrong thing.
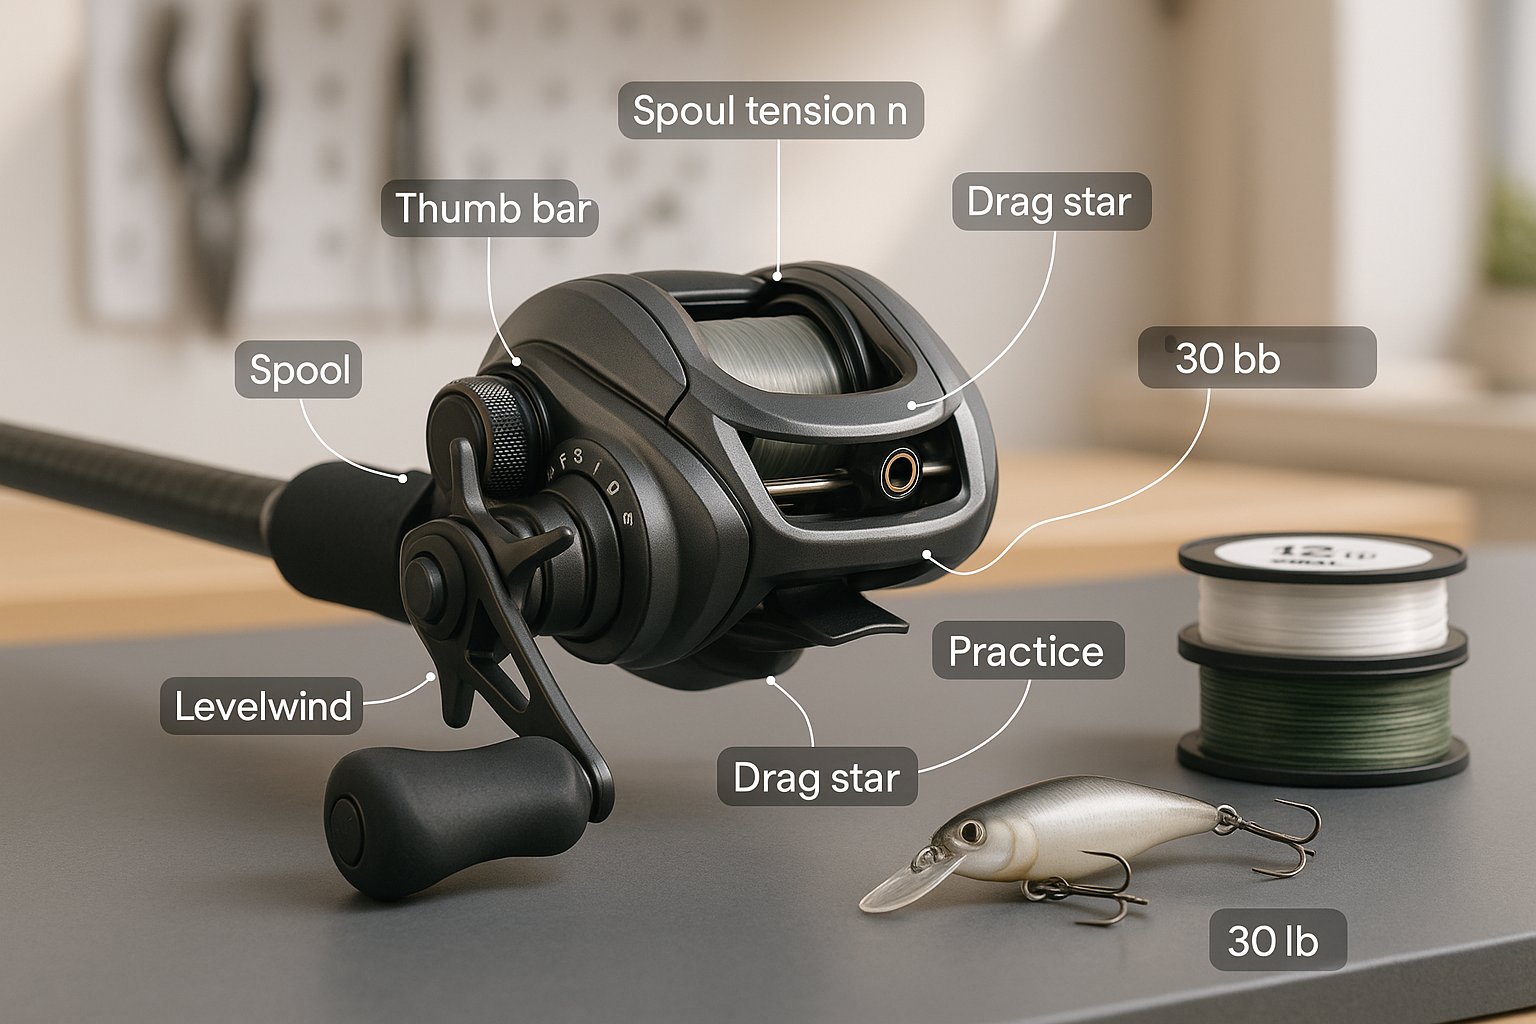
A baitcasting reel has a few key components that matter most during setup:
-
Spool: Holds the fishing line and spins during the cast.
-
Spool tension knob: Applies light pressure to the spool shaft and affects startup control.
-
Braking system: Slows the spool during the cast to reduce overruns.
-
Drag star: Controls resistance when a fish pulls line: it does not control casting.
-
Handle and gear train: Retrieve line and provide cranking power.
-
Thumb bar or clutch: Disengages the spool for casting.
-
Levelwind: Guides line evenly across the spool.
What each adjustment actually does
A lot of anglers confuse spool tension with brakes. They work together, but they do different jobs.
Spool tension controls how freely the spool starts rotating. Think of it as the reel's startup limiter. Too tight, and casts feel short and forced. Too loose, and the spool can overrun the instant the lure starts moving.
Brakes manage spool speed during the cast itself. This is where baitcaster brake settings explained really matters: brakes help keep the spool from spinning faster than the line leaving the reel, especially at the beginning and middle of the cast.
The three controls beginners should focus on
If we're setting up a baitcaster for the first time, we only need to worry about three things:
-
Lure weight matched to rod and reel
-
Spool tension set to the lure
-
Brakes set high enough to prevent backlash
That's it. We don't need to overcomplicate the process.
A quick note on line choice
Line also affects setup. Heavier line is usually easier for beginners because it's less likely to dig into itself on the spool. Many anglers learn faster with:
-
12–15 lb monofilament for practice
-
30–40 lb braid with backing if they prefer braid
Very light lures and ultra-thin line make the reel less forgiving. For our first few sessions, a medium-weight practice lure, around 3/8 oz, usually makes setup much easier.
How to Adjust Spool Tension Correctly

If there's one step that makes or breaks a baitcaster setup, it's this one. Knowing how to adjust spool tension baitcaster style gives us a controlled starting point before we even make a cast.
Start with the lure tied on
Spool tension should be adjusted with the exact lure we plan to throw. A 1/4 oz Texas rig and a 1/2 oz spinnerbait won't behave the same, so the reel needs to be matched to the bait.
Here's the step-by-step process:
-
Tie on the lure you'll cast.
-
Tighten the spool tension knob until there's little or no side-to-side spool play.
-
Hold the rod level.
-
Press the thumb bar while controlling the spool with your thumb.
-
Slowly back off the tension knob.
-
Stop when the lure begins to fall smoothly and the spool doesn't instantly overrun when the lure touches the ground.
This classic drop test is still one of the easiest ways to set initial tension.
What "correct" spool tension feels like
A good starting setting feels controlled, not locked down. The lure should fall steadily, not like a rock, and not like it's stuck. We want the spool to start easily but stay predictable.
A simple rule:
-
Too tight: short casts, hard loading, poor distance
-
Too loose: instant fluff, especially at the start of the cast
For beginners, it's smart to start slightly tighter than ideal. We can always loosen it in small increments as our thumb control improves.
Common spool tension mistakes
The biggest mistake is using spool tension as the main brake. That can make the reel feel "safe," but it kills casting performance and teaches bad habits. Spool tension should fine-tune startup: the braking system should handle most of the control.
Other mistakes include:
-
Adjusting tension without a lure attached
-
Ignoring spool side play
-
Making huge turns instead of tiny changes
-
Re-adjusting after every bad cast instead of checking technique first
Pro tip for faster reel adjustment
If we switch lure weights during the day, we don't need to rebuild the setup from scratch every time. Just recheck two things:
-
The lure drop behavior
-
The amount of side-to-side spool play
In most cases, a small tweak of the tension knob is enough. That's the heart of efficient reel adjustment on the water: small changes, then test casts.
How to Set the Braking System
Once spool tension is close, the brakes do the heavy lifting. If we want fewer backlashes and smoother learning, this is where we should be generous at first. In any solid baitcaster setup guide, the advice is the same: begin with more brake than you think you need, then back it off gradually.
Know which brake system your reel uses
Most baitcasters use one of three systems:
-
Magnetic brakes: Adjusted with an external dial: easy and beginner-friendly.
-
Centrifugal brakes: Internal brake blocks that engage as spool speed rises.
-
Dual-brake systems: Combine both for more tuning options.
Magnetic systems are usually the easiest to learn because we can make quick changes on the water without opening the side plate.
A simple beginner brake setting
For first casts, start high.
-
On a 0–10 magnetic dial, begin around 7 to 9.
-
On a centrifugal system, turn on more brake blocks than off, often 2, 4, or 6 depending on the design.
-
On dual systems, set centrifugal brakes moderately high and magnetic brakes in the upper-middle range.
This may reduce casting distance a bit, but it dramatically improves control.
How to fine-tune brake settings
After a few casts, we can lower the brake setting gradually if the spool feels too restricted.
Reduce braking when:
-
Casts are consistently clean
-
The lure flight feels overly slowed
-
Distance is clearly limited
-
We're not seeing spool fluff near splashdown
Increase braking when:
-
Backlash happens right after release
-
The spool overruns in mid-cast
-
Wind is pushing against the lure
-
We switch to a lighter bait
Baitcaster brake settings explained by cast phase
This is the useful mental model:
-
Beginning of the cast: Highest spool acceleration: backlash risk is high
-
Middle of the cast: Brakes keep spool speed matched to lure speed
-
End of the cast: Our thumb matters most as the lure slows down
That last point is important. No brake system completely replaces thumb control, especially when the bait hits the water or stops suddenly.
Best practice for real-world conditions
Brake settings aren't one-and-done. Wind, lure shape, and line type all affect spool speed.
A compact 1/2 oz jig and a bulky weightless soft plastic may weigh similarly, but they cast very differently. The more air resistance a lure has, the more likely it is to slow mid-flight and create overrun. In those cases, we usually need a bit more brake, even if lure weight hasn't changed.
That's why smart setup is less about chasing maximum distance and more about matching the reel to the lure and conditions.
First Cast Setup Tips for Beginners
The first few casts are where confidence is built, or lost. A good reel setup helps, but casting technique finishes the job. If we're serious about learning how to set up baitcasting reel systems the right way, we need a clean first-cast routine.
Use the right practice setup
For learning, keep everything as forgiving as possible:
-
Rod: Medium-heavy power, fast action
-
Lure: 3/8 oz practice plug, jig, or casting weight
-
Line: 12–15 lb mono or manageable braid
-
Brakes: Set higher than normal
-
Spool tension: Slightly conservative
This combo loads well and gives us enough resistance to feel the cast develop.
Make smooth casts, not hard casts
Most beginner backlashes come from overpowering the rod. A baitcaster likes a smooth acceleration, not a violent snap.
A good first motion looks like this:
-
Start with a short amount of line outside the rod tip.
-
Bring the rod back smoothly.
-
Accelerate forward in one controlled motion.
-
Release thumb pressure as the rod loads.
-
Lightly feather the spool during flight.
-
Stop the spool completely just before the lure lands.
That final thumb stop prevents many of the "perfect cast until splashdown" bird's nests beginners get.
Beginner baitcaster setup tips that actually help
These are the habits that speed up the learning curve:
-
Practice in an open area before fishing tight cover.
-
Cast with the wind at your back at first.
-
Use sidearm or low overhead casts instead of trying to bomb long casts.
-
Check the spool after each cast for loose coils before the next one.
-
Peel out bad loops early before they tighten.
And one more: don't chase distance right away. Controlled 50-foot casts beat tangled 90-foot casts every time.
What to do if we still get backlashes
Backlash location tells us a lot:
-
At the start of the cast: spool tension may be too loose, brakes too low, or casting motion too aggressive.
-
Mid-cast: brakes likely need to go up.
-
At splashdown: we need better thumb timing.
A quick troubleshooting checklist:
|
Problem |
Likely cause |
Fix |
|---|---|---|
|
Instant overrun |
Low tension or too much force |
Tighten slightly, cast smoother |
|
Mid-flight fluff |
Brake setting too low |
Increase brakes |
|
Overrun at landing |
Late thumb stop |
Feather earlier and stop spool |
|
Short casts |
Too much tension or brake |
Reduce one setting at a time |
Learning a baitcaster is mostly pattern recognition. Once we connect the type of backlash to the cause, setup gets much easier.
Recommended Baitcasting Reels for Easy Setup
Some reels are simply easier to learn on than others. For beginners, the best choice usually isn't the highest-speed, tournament-focused model, it's the reel with predictable controls, a forgiving braking system, and solid build quality.
What makes a baitcaster easy to set up
When evaluating options, we should prioritize:
-
External brake adjustment for quick tuning
-
Consistent spool startup without feeling overly free
-
Well-marked controls that are easy to understand
-
Reliable frame and gears that stay smooth under load
-
Good line capacity for common bass techniques
A shallow learning curve matters more than squeezing out a few extra yards of casting distance.
Beginner-friendly reel types to look for
Rather than chasing one "perfect" reel, it helps to know the categories that simplify setup.
Magnetic-brake baitcasters are often the easiest first buy. They make quick on-the-water changes simple, which is ideal when we're still learning lure-specific tuning.
Dual-brake reels are excellent if we want room to grow. They can feel more technical at first, but they offer a wide adjustment range once we understand the basics.
Compact low-profile reels in a moderate gear ratio, around 6.6:1 to 7.3:1, are the most versatile choice for general freshwater use.
Features worth paying for
If budget allows, these features genuinely help:
-
Quality braking system over flashy cosmetics
-
Smooth spool bearings with controlled startup
-
Rigid aluminum frame for better long-term consistency
-
Comfortable palmable shape for better thumb control
A practical buying approach
For most anglers learning from scratch, the safest route is a mid-range low-profile reel from a reputable brand with clear brake settings and easy parts support. Brands such as Shimano, Daiwa, Abu Garcia, Lew's, and 13 Fishing all offer beginner-friendly models in different price tiers.
The best reel is the one we can adjust confidently. If the controls are intuitive and the reel responds predictably when we make small changes, our setup process will be faster and less frustrating.
In other words, the "easy setup" reel isn't necessarily the most advanced reel. It's the one that helps us learn spool control, understand braking, and build repeatable casting mechanics.
Frequently Asked Questions on How to Set Up a Baitcasting Reel
What are the key components to understand when setting up a baitcasting reel?
Key components include the spool, spool tension knob, braking system, drag star, handle and gear train, thumb bar or clutch, and levelwind. Each controls different aspects vital for proper reel adjustment and casting performance.
How do I properly adjust the spool tension on a baitcasting reel?
Tie on your lure, tighten the spool tension knob until minimal spool play, hold the rod level, press the thumb bar, then slowly loosen the tension until the lure falls smoothly without spool overrun. This controls spool startup for better casting.
Why is the braking system important on a baitcasting reel and how do I set it?
Brakes control spool speed during the cast to prevent backlash. Beginners should start with a high brake setting (e.g., 7–9 on a 0–10 magnetic dial), then gradually reduce it as casting improves to balance distance and control.
What line and lure weight are best for beginners using baitcasting reels?
Beginners should use 12–15 lb monofilament or 30–40 lb braided line. A medium-weight practice lure around 3/8 oz is ideal, as extremely light lures or thin lines make setups less forgiving and harder to control.
How can I troubleshoot backlash issues with my baitcasting reel?
Backlash at cast start often means spool tension or brakes are too low or the cast is too aggressive. Mid-cast backlash usually requires more brake, and backlash at landing suggests poor thumb control. Adjust accordingly and practice smooth casting.
What features should I look for in beginner-friendly baitcasting reels?
Look for reels with external brake adjustments, consistent spool startup, easy-to-understand controls, solid build quality, and moderate gear ratios around 6.6:1 to 7.3:1. Magnetic or dual-brake systems simplify tuning for beginners.
Reel Type Comparison
Use this overview to understand broad differences between reel types. Individual product specifications and intended uses vary by model.
| Reel Type | Best For | Control | Learning Curve |
|---|---|---|---|
| Spinning | Versatile casting | Easy handling | Approachable |
| Baitcasting | Precise lure placement | Direct spool control | More practice |
| Round Baitcasting | Trolling and offshore setups | Controlled line retrieval | Technique dependent |
 Featured

